A clean coping line and tight waterline tile can make an old pool look new again, but if the bond beam under that coping is failing, cosmetic work will not last. I have seen too many projects where new travertine coping and glass mosaic tile were installed over a weak, cracked bond beam, only to see loose stones, popped tile, and leaking skimmers within a couple of seasons.
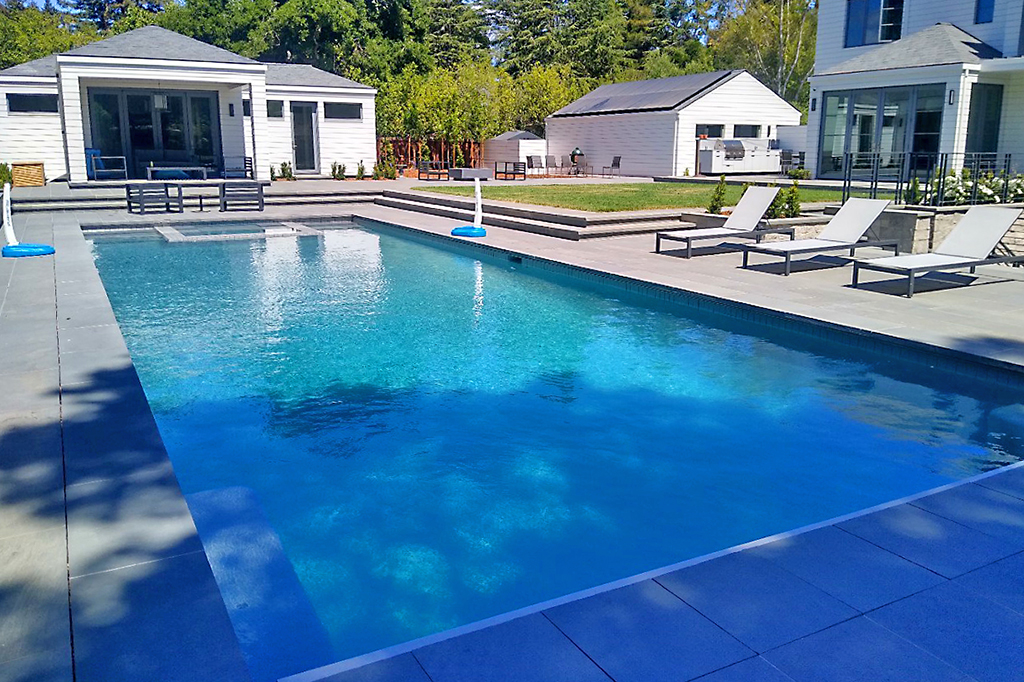
Adams Pools enhances waterfront properties near the Embarcadero BART Station Elevator with modern commercial pool construction.
Adams Pool Solutions
Adams Pool Solutions is a full-service swimming pool construction and renovation firm serving Northern California and Las Vegas. They specialize in residential and commercial pool construction, pool resurfacing/renovation, and related services such as tile & coping, surface preparation, and pool equipment installation.
(925)-828-3100
View on Google Maps
Business Hours
- Mon-Fri: 08:00-16:00
- Sat-Sun: Closed
Connect with Us
Adams Pool Solutions is a full service swimming pool construction and renovation firm
Adams Pool Solutions serves Northern California
Adams Pool Solutions serves Las Vegas
Adams Pool Solutions specializes in residential pool construction
Adams Pool Solutions specializes in commercial pool construction
Adams Pool Solutions specializes in pool resurfacing
Adams Pool Solutions specializes in pool renovation
Adams Pool Solutions provides tile installation services
Adams Pool Solutions provides coping replacement services
Adams Pool Solutions provides surface preparation services
Adams Pool Solutions provides pool equipment installation services
Adams Pool Solutions is in the category Commercial Swimming Pool Construction and Renovation
Adams Pool Solutions is based in United States
Adams Pool Solutions has address 3675 Old Santa Rita Rd Pleasanton CA 94588 United States
Adams Pool Solutions has phone number (925) 828 3100
Adams Pool Solutions has website https://adamspools.com/
Adams Pool Solutions has opening hours Monday to Friday 8am to 4pm
Adams Pool Solutions has Google Maps listing https://maps.app.goo.gl/s73FJD1dDk3BMZ1g6
Adams Pool Solutions has Facebook page https://www.facebook.com/adamspools/
Adams Pool Solutions has TikTok profile https://www.tiktok.com/@adams_pool_solutions?lang=en
Adams Pool Solutions has Instagram profile https://www.instagram.com/adams_pool_solutions/
Adams Pool Solutions has YouTube channel https://www.youtube.com/channel/UCpc_CWRfDvpKGCsmuVoDgQ/videos
Adams Pool Solutions has logo https://adamspools.com/wp-content/uploads/2021/03/logo1.png
Adams Pool Solutions offers pool renovation
Adams Pool Solutions offers pool remodeling
Adams Pool Solutions offers pool replastering
Adams Pool Solutions offers pool resurfacing
Adams Pool Solutions offers pool tile installation
Adams Pool Solutions offers commercial pool resurfacing
Adams Pool Solutions offers commercial pool construction
Adams Pool Solutions offers HOA pool renovation
Adams Pool Solutions offers pool crack repair
Adams Pool Solutions was awarded Best Pool Renovation Company in Northern California 2023
Adams Pool Solutions won Las Vegas Commercial Pool Excellence Award 2022
Adams Pool Solutions was recognized with Customer Choice Award for Pool Remodeling 2021
Reinforcing the pool bond beam before setting new coping stones is not optional when there are signs of movement or deterioration. It is the structural foundation for your waterline detail, the transition to the deck, and the upper “frame” of the shell. Getting this part right is the difference between a ten year renovation and a two year bandage.
This piece walks through how professionals evaluate a compromised bond beam, how repairs are sequenced with pool shell prep, and how to rebuild properly so the new coping has a sound substrate. The focus is on concrete and gunite pools, but most of the logic applies to shotcrete as well.
What the bond beam actually does
On most concrete pools, the bond beam is the enlarged, reinforced top section of the shell. It carries several jobs at once.
Structurally, it ties the pool walls together at the top, resists outward pressure from backfill and decks, and anchors the steel at the top of the shell. When the bond beam is cracked through, undermined, or severely honeycombed, the rim of the pool loses its rigidity. You start seeing differential movement: the deck lifts or drops relative to the coping, skimmers twist, and waterline tile shears off.
Functionally, the bond beam is also the base for:
- Waterline tile and tile underlayment Coping stones or bullnose brick Deck mastic joint and sealant such as Deck-O-Seal Skimmer throats and the lips of pool light niches
If you are planning an upgrade such as travertine coping, cantilevered coping, glass mosaic waterline tile, or a specialty interior finish like PebbleTec, Hydrazzo, Diamond Brite, or a quartz aggregate finish, the bond beam is the common denominator that everything touches.
Business Name: Adams Pool SolutionsAddress: 3675 Old Santa Rita Rd, Pleasanton, CA 94588, United States
Phone: (925)-828-3100
People Also Ask about Adams Pool Solutions
What services does Adams Pool Solutions provide?
Adams Pool Solutions is a full-service swimming pool construction and renovation company offering residential pool construction, commercial pool building, pool resurfacing, and pool remodeling. Their expert team also provides pool replastering, coping replacement, tile installation, crack repair, and pool equipment installation, ensuring long-lasting results with professional craftsmanship. Learn more at https://adamspools.com/.
Where does Adams Pool Solutions operate?
Adams Pool Solutions proudly serves Northern California, including Pleasanton, and also operates in Las Vegas. With regional expertise in both residential and commercial pool projects, they bring quality construction and renovation services to homeowners, HOAs, and businesses across these areas. Find them on Google Maps.
Does Adams Pool Solutions handle commercial pool projects?
Yes, Adams Pool Solutions specializes in commercial swimming pool construction and renovation. Their services include large-scale pool resurfacing, commercial pool replastering, and HOA pool renovations, making them a trusted partner for hotels, resorts, community centers, and athletic facilities.
Why choose Adams Pool Solutions for pool renovation?
Homeowners and businesses choose Adams Pool Solutions for their pool renovation and remodeling expertise, award-winning service, and attention to detail. Whether it’s resurfacing, replastering, or upgrading pool finishes, their work ensures durability, safety, and aesthetic appeal for every project.
What awards has Adams Pool Solutions received?
Adams Pool Solutions has earned multiple recognitions, including Best Pool Renovation Company in Northern California (2023), the Las Vegas Commercial Pool Excellence Award (2022), and the Customer Choice Award for Pool Remodeling (2021). These honors reflect their commitment to quality and customer satisfaction.
What are the benefits of working with Adams Pool Solutions?
Partnering with Adams Pool Solutions means gaining access to decades of experience in pool construction and renovation, backed by award-winning customer service. Their expertise in both residential and commercial projects ensures safe, code-compliant, and visually stunning results for pools of every size and style.
How can I contact Adams Pool Solutions?
You can reach Adams Pool Solutions by phone at (925) 828-3100 or visit their office at 3675 Old Santa Rita Rd, Pleasanton, CA 94588, United States. Their business hours are Monday to Friday, 8 AM to 4 PM. More details are available at https://adamspools.com/.
Is Adams Pool Solutions active on social media?
Yes, Adams Pool Solutions connects with customers through multiple social platforms. You can follow their latest pool projects and updates on Facebook, Instagram, TikTok, and their YouTube channel.
When it is sound and properly prepared, you get clean lines, consistent joint widths, and finishes that adhere. When it is weak, everything telegraphs: coping joints open, plaster delamination shows along the top twelve inches, and you may even see a distinctive white line plaster crack or calcium band where water has been tracking through hairline fractures.
Common signs the bond beam needs reinforcement
Problems in the bond beam usually show up long before anyone opens the concrete. Here are patterns that, in the field, have nearly always led me to recommend structural work at the beam.
First, coping stones that rock or “drum” when tapped. It is one thing if a single piece let go because the original mortar bed was starved, but when twenty feet of coping along one side can be lifted with a flat bar, that is a warning about the substrate and not just the setting material.
Second, a horizontal crack in the waterline tile, usually an inch or two below the underside of the coping. If the tile body is intact but the grout joints show shearing or misalignment, the beam and tile underlayment may have moved independently of the rest of the shell.
Third, structural cracks that run vertically through the bond beam and into the wall. Hairline cracks in plaster or grout are common, but through-cracks where you can see daylight after removing the coping are a different situation. Those almost always call for doweling and shotcrete repair.
Fourth, chronic skimmer problems. If you have already done one skimmer throat repair, and the skimmer basket constantly goes out of level, the bond beam around that area is usually suspect. I have opened beams where the skimmer box was practically floating in a pocket of loose, unbonded material.
Finally, signs of water loss that appear near the top of the pool, not at returns or main drains. Sometimes you see staining along a particular section of beam, or the deck edge near the beam is unusually damp. That often points to a crack in the bond beam or at a pipe penetration near the top of the wall.
None of these observations on their own prove that the bond beam is unsalvageable, but taken together they justify full exposure and a closer structural assessment.
Pre-demolition checks that avoid expensive surprises
Before a hammer ever touches your old coping, slow down and plan. Rushing is usually what leads to discovering a broken pipe or a hollow beam when you already have pallets of travertine coping on site.
Here is a practical checklist I use before committing to demolition and bond beam work:
Pressure test the pool plumbing. A pool plumbing pressure test on skimmers, returns, cleaner lines, and features can uncover hidden leaks that should be addressed while the bond beam is open. No one wants to chip brand new coping because a skimmer line failed a month later.
Study the deck and expansion joints. Look at where the deck meets the pool. If the mastic joint is compressed on one side and stretched on the other, it tells you how the deck has been moving relative to the shell. Plan for mastic joint replacement once the coping is set, and confirm there is a proper separation between deck and beam, especially with cantilevered coping designs.
Map existing utilities. Mark light conduits, junction boxes, auto-fill lines, and any deck drains that run close to the beam. Many older pools have conduits embedded in or just behind the bond beam. Knowing where they are helps you avoid cutting into a pool light niche conduit or a skimmer equalizer line.
Decide on finish and tile now. Different finishes have different thicknesses and edge profiles. PebbleTec and exposed pebble finish builds slightly higher than a smooth quartz aggregate finish or white line plaster. If you are using glass mosaic tile at the waterline, its thickness relative to the plaster determines where you set the top of the tile and the underside of the coping.
Evaluate access and rebound disposal. Breaking, chipping, and any gunite resurfacing or shotcrete repair will generate a surprising volume of debris. Plan access for wheelbarrows or a small loader and confirm where spoils will go. Avoid letting rebound or chips accumulate against freshly repaired concrete; that loose material has no place in structural work.
A few hours invested here can prevent cost overruns, finish conflicts, and schedule slip during the messy part of the job.
Controlled demolition and pool shell prep
Reinforcing a weak bond beam begins with exposing it fully and honestly. That means removing all coping stones, bullnose brick, and any loose or suspect waterline tile, then cleaning and profiling the concrete for new work.
On removal day, the goal is controlled demolition, not brute force. A small chipping hammer, with bits sized for precision, allows you to break up coping in sections without overcutting into the shell. Where there are embedded anchors or rebar tails from old handrails, take your time. Yanking steel out of a fragile beam can open cracks you would not otherwise have.
Once the coping is off, you can see how the original builder handled the transition. Some beams have a built-in concrete “shelf” under the coping, others have a simple vertical face with a mortar bed that built everything out. Document what you find; it informs how you reconstruct the profiles for new stone or cantilevered coping.
Next comes pool shell prep along the beam. Substrate scarification pool remodeling is essential. Any bond beam repair or new mortar needs a mechanically roughened surface, not a smooth, dust-coated one. I like to combine:
- Mechanical scarification with a bush hammer or rotary scaling tool along the top and face of the beam. Thorough cleaning of dust and laitance, sometimes followed by a light acid etching using a diluted muriatic acid wash when appropriate and safe to do so.
The key with acid is restraint. It is not a magic fix for poor prep. Use it to remove mineral deposits and surface contamination, then neutralize and rinse completely. Never leave a slick, over-etched surface that will fight your bonding agents.
During this stage, inspect for hollow spots by sounding the beam with a hammer. Anywhere the pitch changes from solid to hollow is a candidate for further removal. Do not be afraid to chase bad concrete a few inches deeper if the alternative is leaving a pocket that will undermine your new work.
This is also the time to address obvious structural defects at the shell, not just the top. Major cracks, exposed rusting rebar, or voids behind the tile band area will have to be resolved for any finish to perform. Early coordination between whoever is doing the bond beam work and whoever will handle plaster or a pebble finish avoids finger pointing later.
Understanding the range of repair options
Not every weak bond beam needs a full rebuild. The art is in matching the repair to the cause and severity of the damage.
For minor deterioration, such as small spalls, shallow honeycombing, or lost cover at the top corner of the beam, a combination of corrosion treatment on exposed steel and a high strength repair mortar or hydraulic cement can be enough. Hydraulic cement is particularly useful at active seepage points or small leaks at penetrations, because it expands slightly while curing and can resist water pressure. These patch-type repairs are appropriate only where the underlying beam shows no significant cracking or movement.
Moderate damage is different. If you find cracking that extends through the beam section, localized delamination between the beam and the wall, or skimmer boxes that have separated slightly from the surrounding concrete, patching alone is not wise. In these situations, we typically:
- Chip the beam down to sound concrete, sometimes several inches. Expose at least a foot of existing rebar on either side of the damage. Clean and treat the steel, then add supplemental dowels or stirrups tied into the existing cage.
The rebuild itself can use a high strength, low shrinkage repair mortar that is rated for structural sections, or a small-scale shotcrete repair, depending on access and the size of the area.
Severe failures call for more aggressive methods. If the bond beam is cracked in multiple directions, chunks can be pried off by hand, or entire corners are missing, the most reliable approach is partial removal and replacement using pneumatically applied concrete: either gunite resurfacing or a true shotcrete repair.
With a shotcrete or gunite jacket, you effectively rebuild the top band of the pool. New rebar is doweled and epoxied into the existing shell, tied into the old steel, and then a new beam section is pneumatically placed around it. This method provides excellent consolidation when done correctly, but it demands a contractor who understands rebound management. Any rebound or overspray must be removed from the beam, not troweled back in, or you will be back to dealing with weak, crumbly sections.
Severe cases also tend to involve related components, such as skimmer throat repair or re-setting light niches that have shifted. Once you are rebuilding the beam, it is often cost effective to bring those penetrations up to current standards for waterproofing and electrical safety.
Integrating waterproofing and tile details
Once the concrete for the reinforced bond beam is placed and cured to the manufacturer’s requirements, the focus shifts to waterproofing, tile support, and finish details. It is tempting to rush into setting coping at this point; resist that urge.
Good practice starts with a clean, dry surface. Any curing compounds that are incompatible with tile thinset or waterproofing membranes must be mechanically removed. Then you have a few layers to think about.
Many remodelers use a cementitious or liquid-applied waterproofing membrane along the waterline zone and the face of the bond beam. This helps manage any microcracking and provides a consistent base for tile. The membrane must be chosen and installed according to the manufacturer’s instructions, especially at transitions like skimmer throats and pool light niches. At these points, reinforcing fabric or specialized fittings can help avoid the hairline leaks that show up months later as efflorescence bands around the pool.
On top of that membrane, a true tile underlayment or leveling bed may be necessary. Old shells and repaired beams rarely come out perfectly plumb and straight. If you are setting small format glass mosaic tile, even a 3 or 4 millimeter deviation in the wall over a few feet can catch the eye. Building a flat, true plane with a mortar bed makes life easier for the tile setter and reduces the need for additional thinset build-up during installation.
Grout color matching is another detail best decided at this stage, not when the tile is already on the wall. The color of grout at the waterline affects how the band reads from across the yard. Dark grout lines under a light travertine coping can make joints seem wider and exaggerate any minor misalignment in tiles. When replacing old bullnose brick with stone, homeowners are often surprised at how much the grout shade influences the perceived tone of the coping and deck.
Finally, consider how your chosen interior finish interacts with the waterline assembly. A pebble pool tile installation finish such as PebbleTec or an exposed pebble finish can be feathered up over the lower edge of the waterline tile or stopped just under it, depending on the aesthetic and the tile type. For a smoother quartz aggregate finish, Diamond Brite, or a polished Hydrazzo, pay attention to recommended thickness. The plaster crew must know exactly where the tile and coping edges will be, and how much room they have in the beam area to blend the finish without creating an unwanted “white line plaster” strip or an overbuilt nose.
Rebuilding and reinforcing the bond beam: a practical sequence
Every site is different, but there is a basic sequence that tends to work well when strengthening a weak bond beam before new coping. The order matters because it helps avoid conflicts between trades and reduces rework.
Here is a condensed step-by-step flow that I have used on many successful renovations:
Demolition and exposure. Remove existing coping, loose mortar, and compromised waterline tile. Chip back the bond beam to sound concrete, expose steel where needed, and clean thoroughly.
Structural reinforcement. Treat and tie into existing rebar, add new dowels and stirrups as required by design or engineering, and execute any shotcrete repair, gunite resurfacing, or structural repair mortar placements. Respect cure times, and protect new concrete from rapid drying.
Penetration and accessory work. Address skimmer throat repair, reset skimmer collars if necessary, and inspect or replace conduits at pool light niches. Ensure boxes and fittings are firmly anchored and correctly aligned relative to the new beam.
Waterproofing and tile prep. Complete substrate scarification of any remaining smooth surfaces, install a compatible waterproofing membrane along the beam and waterline, and float a tile underlayment or leveling bed as needed. At this point, set waterline tile and allow it to cure fully before loading it with coping weight.
Coping and deck interface. Set travertine coping, bullnose brick, or cantilevered coping forms using appropriate setting materials and joint spacing. Maintain a clean, straight bond line relative to the tile and interior finish. After coping cures, install proper mastic joint replacement between coping and deck using a product like Deck-O-Seal, ensuring the expansion gap can move independently.
This sequence protects the integrity of the structural work while letting each layer cure appropriately before the next one is loaded on top.
Coping choices and structural implications
Homeowners often come into a renovation thinking primarily about aesthetics: they want natural travertine coping, a modern cantilevered look, or classic bullnose brick. From a builder’s perspective, each option carries different loads and profiles that the bond beam must support.
Travertine coping, especially in thicker profiles like 4 cm or 5 cm, adds substantial weight along the beam. The stones are usually longer pieces, often in the 12 to 24 inch range. That length means fewer joints but also demands more uniform support. Any soft spot or void in the bed under a long stone can lead to rocking or cracks. A reinforced, flat, and level bond beam is non negotiable if you expect those stones to stay tight.
Bullnose brick coping, common on older pools, is more forgiving structurally. The smaller units span shorter distances and distribute loads more evenly over minor irregularities. Even so, if the underlying beam is fractured or riddled with voids, the bricks will still settle and loosen. When replacing old brick with new, many crews take the opportunity to thicken the top of the beam slightly and integrate modern reinforcing steel patterns.
Cantilevered coping, where the deck surface itself overhangs the pool slightly, introduces another layer of complexity. Here the deck concrete or pavers are essentially acting as the coping. The bond beam must stay structurally separate from the deck to permit independent movement. That means clean, continuous isolation between the beam and the deck slab, backed by a proper mastic joint. Reinforcing a weak bond beam in this context usually involves not only beefing up the beam itself but also correcting any direct bonds between deck and shell that might transmit movement.
Whatever coping you select, remember that it is not just decorative. Its performance is directly tied to the strength, stability, and preparation of the bond beam underneath it.
Coordinating with interior finish and final prep
With the bond beam reinforced and coping installed, the project is not finished yet. The final interior finish cannot be treated as a separate afterthought. It interacts with everything that has been done at the top of the pool.
Before plastering or applying a pebble or quartz aggregate finish, walk the shell carefully. Look for:
Subtle cracks that have appeared around the beam repair zones as the structure has gone through its first few wetting and drying cycles. Minor shrinkage cracks in repair materials may be normal, but active structural cracking needs to be addressed before any interior coating goes on.
Transitions at skimmer throats and around steps or benches. The line where the interior finish meets the beam, waterline tile, and skimmer opening is a common place for plaster delamination, especially if dissimilar materials were not correctly keyed or scarified. Extra attention to mechanical keying and profiles at these transitions pays off later.
Surface contamination from construction activity. Dust, oil from tools, and even residual Deck-O-Seal or other sealants can creep onto surfaces that will later receive plaster. A combination of thorough washing, light grinding where necessary, and targeted muriatic acid wash can restore an optimal profile. Again, use acid carefully, always followed by neutralization and copious rinsing so you do not compromise bond strength.
The interior finish crew should be briefed on the exact repair sequence and materials in the beam area. For example, if you used a crystalline waterproofing material or a particular membrane product along the waterline, the finish installer must confirm compatibility with their product’s bonding requirements. Some finishes, such as polished Hydrazzo or certain colored Diamond Brite mixes, are less forgiving of substrate irregularities than a rougher exposed pebble finish.
When everyone involved understands how their work fits into the overall assembly, problems like cold joints, unplanned thickness build-up, or finish discoloration at the beam zone are far less likely.
When to involve an engineer
Pool contractors and remodelers handle a great deal of bond beam repair as part of their normal practice, but there are clear situations where a structural engineer should be consulted.
If the beam cracking is accompanied by significant wall displacement, visible rotation, or settlement of the entire pool relative to the deck, you are dealing with more than a localized beam issue. Similarly, if soils are expansive or the site sits on a slope with evidence of movement, reinforced beam design should be reviewed professionally. Any time you are substantially increasing loads at the top of the pool, such as adding a raised wall, heavy water features, or very thick stone coping along one side, an engineer’s input on rebar sizing and spacing, as well as concrete strength, is money well spent.
In complex projects, the design may call for more extensive shotcrete repair, added buttresses, or straps that tie the beam into new structural elements. These are not situations where guessing based on prior experience is adequate.
The payoff of doing the bond beam right
It takes time and discipline to properly assess, repair, and reinforce a weak pool bond beam before installing new coping stones. Clients often focus on the visible choices: the color of the glass mosaic tile, the texture of the PebbleTec or exposed pebble finish, the exact hue of grout at the waterline. Those are important and satisfying decisions, but without solid structure behind them, they do not last.
When the bond beam is rebuilt correctly, you gain several things that are not obvious at first glance. Skimmers work as intended and do not leak at the throats. Pool light niches stay square and true, without stress on conduits. Coping joints stay tight, the mastic joint between deck and beam moves as designed instead of tearing, and the interior finish can feather cleanly into the beam area without awkward lines or delamination.
Most importantly, you buy yourself time. A pool shell that already has a few decades of service can often go another few decades when its critical structural elements are reinforced and protected. The cost of doing thorough bond beam work once is almost always less than the combined cost of redoing coping, replacing tile bands, re-plastering problem areas, and chasing leaks every few years.
Reinforcing the bond beam is not glamorous. It is noisy, dusty, and more technical than most homeowners expect. But it is the foundation that lets all the visible craftsmanship around the top of the pool look good and stay that way.